


In the current world focused on AI, the ability to train AI models locally and make rapid inference on GPUs at an optimal cost is more important than ever. The construction of your own GPU server with a RTX 4090 or RTX 5090 – like that described here – allows a configuration of eight high performance GPU operating on PCIe 5.0 with complete X16 tracks. This configuration guarantees maximum interconnection speed for the eight GPUs. On the other hand, most similar configurations are limited by the PCIE bus version (such as PCIe 4.0 or even lower), due to the challenges of the longer PCIE extensions.
The execution of models locally means that no API call to external services, no data leak and no transaction of use. In addition, your data remains yours and there are no sharing newspapers with cloud suppliers or sending documents sensitive to external model suppliers. It is perfect for research and for developers concerned with privacy.
In this spirit, we decided to create our own GPU server using easily available and affordable equipment. It is certainly not ready for production, but is more than capable as a platform. (Non-liability clause: This project was developed only for research and educational purposes.))
This guide will guide you through our very effective GPU server construction process using GeForce RTX 4090 from NVIDIA. We will build two identical servers, each housing eight GPU RTX 4090 and offering an impressive quantity of calculation power in a relatively simple and profitable set. All GPUs will work on their 16 full lanes with PCIe 4.0. (Note: We have built and tested our servers exclusively with the GeForce RTX 4090. Although we have not yet tested them with the RTX 5090, they should be compatible and should operate with PCIe 5.0.))

Why create this server?
At a time of rapidly evolving AI models and increasing dependence on cloud -based infrastructure, there is a solid case for the training and management of models locally, in particular for research, experimentation and acquire practical experience in building a personalized GPU server configuration.
The NVIDIA RTX series from GPUS presents a convincing option for this type of project, offering phenomenal performance at a competitive cost.
The RTX 4090 and RTX 5090 are absolute animals. With 24 GB of VRAM and 16,384 CUDA cores on the RTX 4090, and a 32 GB expected from VRAM and 21760 CUDA on the RTX 5090, both offer exceptional FP16 / BF16 and tensor’s performance – GPUS rivalries from Datacenter to a fraction of the cost. While business quality options such as H100 or H200 offer higher level performance, they are delivered with a high price. For less than the cost of a single H100, you can stack several (4-8) RTX 4090 or 5090 everything and reach a serious flow for the inference and even the training of smaller models.
The construction of a small GPU server, in particular with Powerhouse GPUs such as the Nvidia RTX 4090 or the new RTX 5090, offers exceptional flexibility, performance and confidentiality to execute large language models (LLM) such as Llama, Deepseek and Mistral, as well as diffusion models, or even personalized fine variants. Open source modern models are designed with effective inference in mind, often using expert mixtures (MOE), and the 4090 can easily manage these workloads. Depending on their parameter size, many of these models can also work as dense models on a small server like ours, without requiring quantification.
Do you want to build your own co -pilot? A personal chatbot? A pipeline of local rags? Do.
Use libraries like vllm,, GGUF / LLAMA.CPP,, Or even a complete inference of Pytorch with Deeppeed, you can enjoy:
- Model parallelism
- Parallelism of tensor or pipeline
- Quantification to reduce the VRAM load
- Economic inference in memory with attention or streaming
You fully control the way your GPU server is optimized, corrected and updated.
Sample configuration
Before diving into the construction process, let’s discuss the reason why this configuration of a particular server deserves to be considered:
- Simplicity: Although the construction of a high performance GPU server may seem intimidating, the parts we use and our adaptations are accessible to those with intermediate technical skills.
- PCIe 5.0 Term: The server offers eight PCIe 5.0 x16 locations, providing a maximum bandwidth and a future intervention for high performance GPUs. Although the RTX 4090 is limited to PCIe 4.0 speeds, this configuration allows transparent upgrades to new generation PCIe 5.0 GPUs, such as the GeForce RTX 5090.
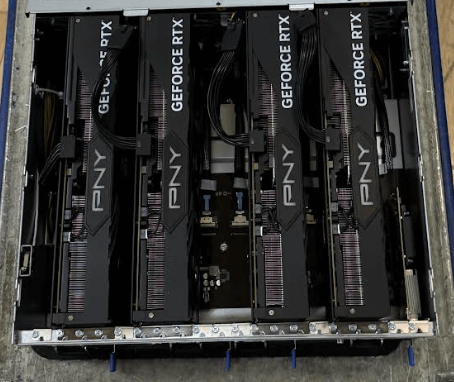
- Configuration of the PCIE card for eight GPUs with 3 locations (for example, RTX 4090 or RTX 5090): In this configuration, the PCIE card is distinct from the main motherboard, a unique design which makes it possible to mount two PCIe PCIe 5.0 plates independent individually. This configuration can accommodate the eight GPUs (four below and four on the top) without requiring complex and costly additional and costly retitimers. As a rule, such components are necessary to maintain the integrity of the signal when PCIE signals move through traces, cables or longer connectors. By minimizing the length and complexity of the signal path, this design ensures full speed connectivity with greater simplicity and reliability.
- Greater than traditional servers: Many server alternatives which offer eight PCIe 5.0 x16 tracks have directly integrated them into the main motherboard. However, this provision makes physically impossible to adapt eight RTX 4090, due to their width to 3 slot. Our configuration resolves this limitation by separating the PCIe planks from the motherboard, allowing complete support of eight GPUs with triple slot without compromise, with a personalized aluminum frame designed to contain four external GPUs.
- Direct PCIe connection: The PCIE PCB card connects to the motherboard using the original communication cables that accompany the server, eliminating the need for cables, retitimeters or PCIe Extender switches. This is a crucial advantage, as extension cables can disrupt the PCIE bus impedance, potentially causing the system of the system down the PCIE versions (such as 3.0 or even 1.0), resulting in significant performance loss.
- Personalized frame solution: We will use a personalized frame built with elements used commonly in the robotic components of Gobilda to keep the 4 upper external GPUs safely. This allows eight 3 -seater GPUs to integrate into this server configuration with the original PCIe5.0 cards and cables, without the need for PCIE Redrivers or PCIE cable extensions.
- Simple power distribution: The power supply is distributed to the two PCIE plates using a 24 -pin ATX and a 6 -pin motherboard extension cables, a 24 -pin AtX separator and a 6 -pin separator.
- High performance infrastructure: We exploit our GPU configuration on a 220 V power supply and use an internet connection with fiber monomode 10g symmetrical.
Server specifications
Before starting the construction process, let’s review the key components and specifications of our GPU server:
- Server model: Asus ESC8000A-E12P
- Gpus: 8x NVIDIA RTX 4090
- Processor: 2x AMD EPYC 9254 processor (24 cores, 2.90 GHz, 128 MB cache)
- RAM: 24x 16 GB PC5-38400 4800MHz DDR5 ECC RDIMM (384 GB in total)
- Storage: 1.92 to micron 7450 pro series M.2 PCIe 4.0 x4 NVME SSD (110 mm)
- Operating system: Ubuntu Linux 22.04 LTS Server Edition (64 bits)
- Networking: 2 x 10gbe lan ports (RJ45, X710-AT2), one used at 10 GB
- Additional PCIe 5.0 card: ASUS 90SC0M60-M0XBN0

Construction procedure
Then let’s go through the step -by -step process to assemble our high performance GPU server.
Step 1: Prepare the server chassis
- Start with the chassis of the ASUS ESC8000AA-E12P server chassis.
- Remove the upper cover and all unnecessary internal components to make room for our personalized configuration.
Step 2: Install the RAM
- Install the 24 x 16 GB DDR5 ECC RDIMM modules in the appropriate locations on the motherboard.
- Make sure they are properly seated and locked in place.

Step 3: Install storage
- Locate the slit M.2 on the motherboard.
- Install the micron 1.92 to 7450 pro series M.2 PCIe 4.0 NVME SSD.

Step 4: Prepare the PCIe boards
- Install the ASUS 90SC0M60-M0XBN0 PCIe 5.0 additional card.
- Reduce four pairs of cables (which are labeled with numbers) from the original PCIE card which is already installed in the server (lower PCIe card). We have alternated the sequence: Define 1 stay in the lower PCIe card, adjustment 2 goes to the upper map, define 3 stays in the lower PCIe card and so on.

Step 5: Create a “Y” separator cable for ATX 24 pins and 6 -pin connectors
- Create extensions of “Y” separator cables to supply the PCIE 5.0 external extension card 90SC0M60-M0XBN0 PCIe 5.0, which will be mounted above the server.
- Make sure that the “Y” separator cable extensions are appropriate gauge to safely manage the supply requirements of the external PCIe card and GPUs.

24 -pin power connectors and 6 pins
Step 6: Install the lower GPUs
- Install four NVIDIA RTX 4090 GPUs in the lower PCIe locations on the original PCIE map located next to the motherboard.
- Make sure the appropriate seats and secure them in place.
Step 7: Prepare the personalized frame for upper GPUs and install them
- We used a custom built frame using Gobilda components.
- Make sure the frame is robust and properly dimensioned to contain four RTX 4090 GPUs.
- Make sure you use power cables with the appropriate gauge to manage each GPU.

Step 8: Configuration of networking
- Identify the two LAN 10GBE ports (RJ45, X710-AT2) on the server.
- Connect one of the ports to your monomode 10g fiber network interface.
Step 9: Final assembly and cable management
- Check all connections and placements of the components.
- Implement good cable management to ensure optimal air flow and thermal performance, such as ensuring that there is enough space between the servers.
Step 10: Installation of the operating system
- Create a startable USB reader with Ubuntu Linux 22.04 LTS Server Edition (64 bit).
- Start the server from the USB player and follow the installation prompts.
- Once installed, update the system and install the pilots necessary for GPUs and other components.
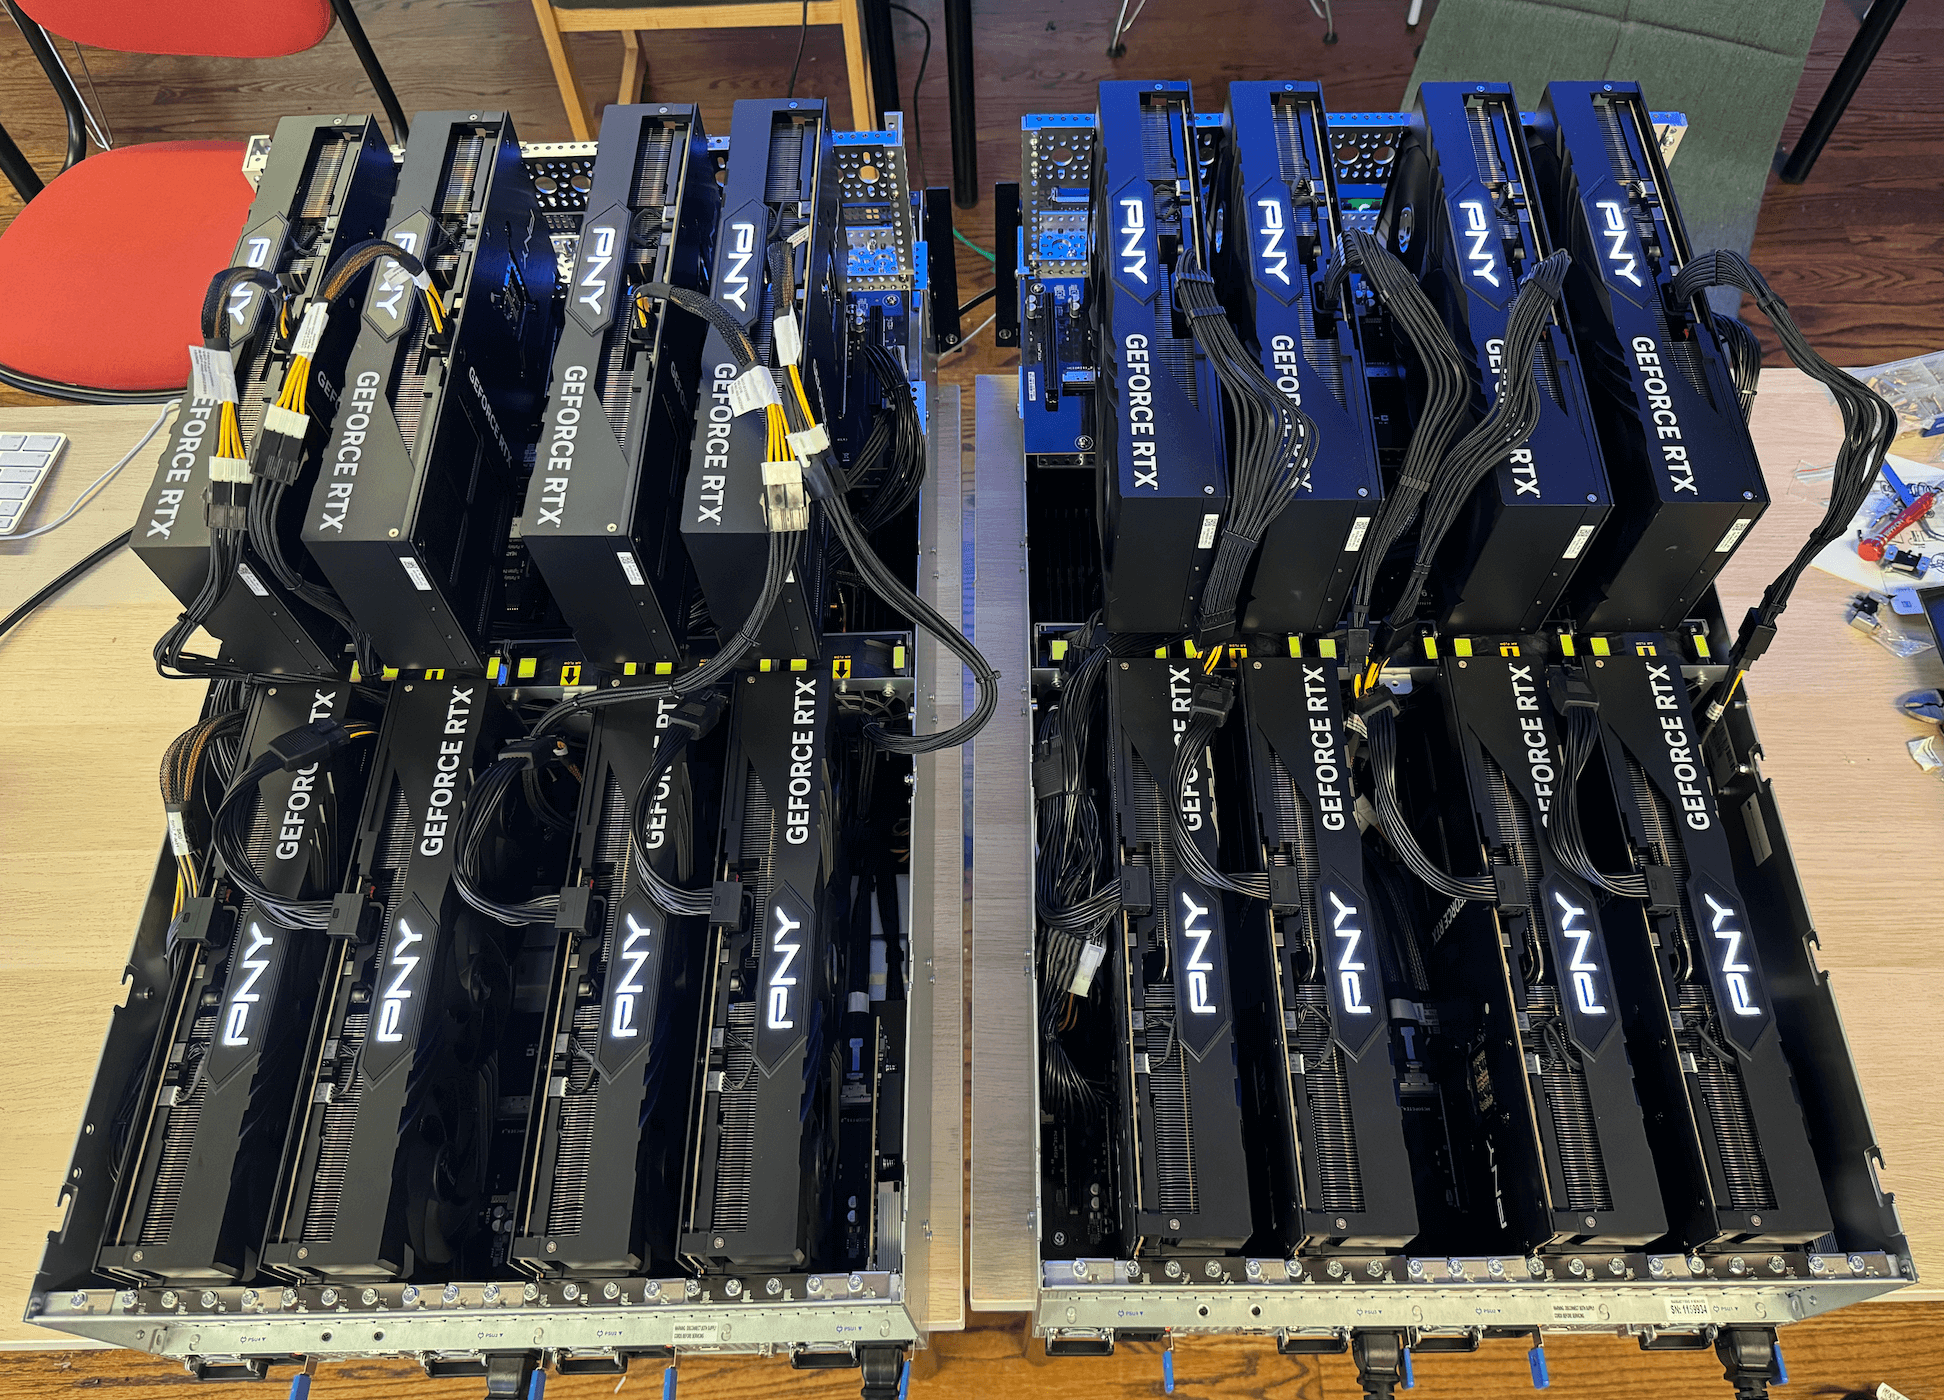
Final construction
Once you have finished all the steps, you should have a GPU server that looks like this and is ready to go to work!

